How to Install a Bathroom Faucet | Professional Guide
Price source: Costs shown are derived from our proprietary U.S. construction cost database (updated continuously from contractor/bid/pricing inputs and normalization rules).
Eva Steinmetzer-Shaw
Head of Marketing
Why a Precise Faucet Installation Matters in Residential Construction
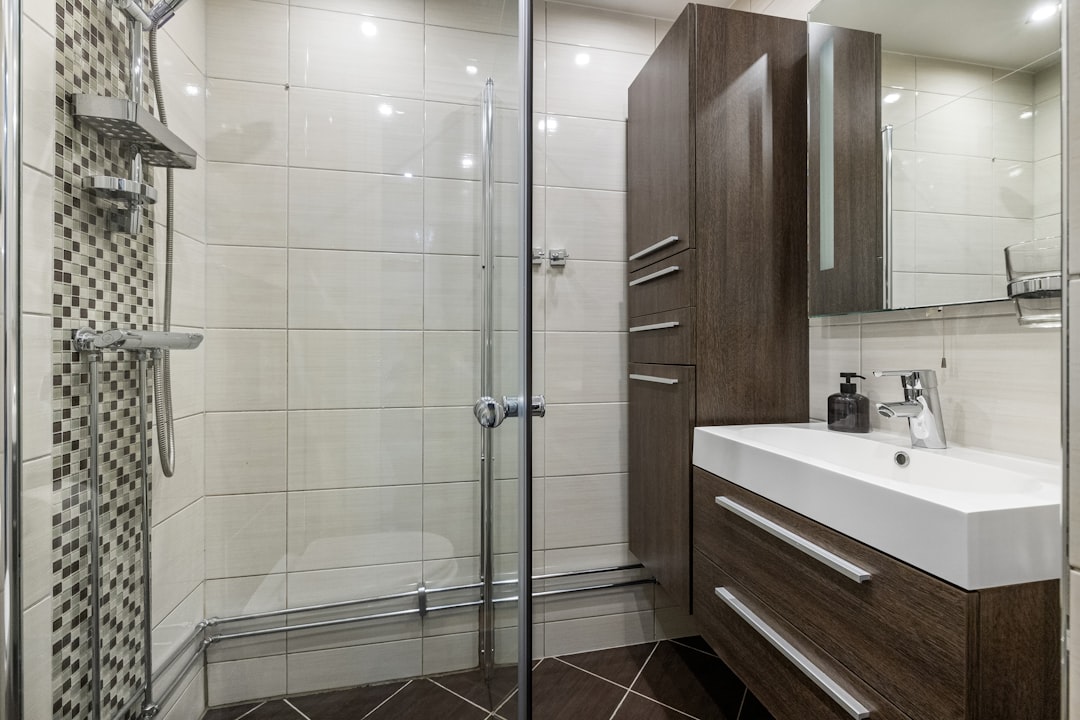
In residential construction, the bathroom faucet is a focal point that can significantly impact the overall aesthetic and functionality of a remodel. A precise installation prevents leaks, protects cabinetry, and showcases craftsmanship. Professional crews combine trade expertise with advanced estimating tools to deliver perfect results and transparent costs. Below is a proven process to learn how to install a bathroom faucet like a pro. Current installation costs range from $170 to $360 per faucet, depending on complexity and location.
Tools and Materials for Professional Faucet Installation
- Adjustable wrench
- Basin wrench (for tight spaces)
- Plumber’s putty or silicone
- Supply lines if not included
- Bucket and towels
- Flashlight or headlamp
- Safety glasses and gloves
Pre-Installation Checklist
- Shut off both hot and cold angle-stop valves under the sink.
- Open the existing faucet to relieve water pressure.
- Place a bucket beneath supply lines to catch residual water.
- Photograph current plumbing for reference.
- Verify the new faucet matches sink hole spacing (centerset, widespread, or single-hole).
Step-by-Step: How to Install a Bathroom Faucet
- Disconnect old supply lines with an adjustable wrench and let water drain into your bucket.
- Use a basin wrench to loosen mounting nuts securing the old faucet.
- Lift the faucet straight up; if it sticks, gently pry while protecting the sink surface.
- Scrape away old plumber’s putty and mineral buildup. A clean deck ensures a watertight seal.
- Dry-fit the new faucet to confirm alignment, then apply a thin bead of plumber’s putty or silicone under the base plate per manufacturer specs.
- Insert faucet through mounting holes. From below, hand-thread mounting nuts until snug.
- Center the faucet, then tighten nuts evenly with a basin wrench—avoid over-torqueing which can crack porcelain.
- Attach new supply lines: hot water on the left, cold on the right. Stainless steel braided lines rated at 125 psi are recommended.
- Open the angle-stop valves slowly and inspect for leaks. If drips appear, tighten a quarter-turn at a time.
- Remove the aerator, flush the faucet for 60 seconds to clear debris, then reinstall the aerator.
Five Pro Tips for Faucet Installation
- Keep a headlamp handy; under-sink lighting saves time and prevents mistakes.
- Wrap wrench jaws with tape to avoid scratching new chrome finishes.
- Measure supply line length twice—excess loops invite kinks that restrict flow.
- If valves are older than ten years, replace them during the faucet swap to eliminate future callbacks.
- Sync your voice estimate to auto-generate the updated fixture list for the homeowner’s warranty packet.
Common Challenges in Residential Projects—and Solutions
- Corroded mounting hardware: Apply penetrating oil, wait ten minutes, then attempt removal again.
- Restricted working space: Use low-profile basin wrenches to navigate tight vanities.
- Off-center supply lines: Flexible lines accommodate mild offsets; severe misalignment may require offset shut-off valves.
AI Support: Enhancing Efficiency and Accuracy
Advanced AI estimators capture every faucet, valve, and escutcheon during blueprint takeoffs. Voice commands on site keep budgets updated in real time, preventing overruns and eliminating paperwork. Homeowners receive a branded PDF quote seconds after installation, complete with itemized labor and material breakdowns.
When to Call a Professional
If you spot hairline cracks in the sink, corroded supply risers inside the wall, or inconsistent water pressure, consider hiring a professional. Licensed plumbers handle these conditions daily and can be scheduled for service in most regions.
Final Inspection and Warranty Registration
Run both hot and cold water for three minutes and wipe every joint with a dry paper towel. No moisture means success. Register the faucet model in the project portal to track warranty timelines and send automatic maintenance reminders to the homeowner.
Next Steps
Ready to elevate your next bathroom upgrade? Explore full-service remodeling packages or upload your floor plan for an instant takeoff. Whether you’re a contractor scaling operations or managing multiple projects, precision and speed are essential.
Case Spotlight: Austin Primary Suite Refresh
When the Ramirez family decided their 1990s primary bath needed new life, they started with a simple faucet replacement. Using advanced estimating tools, every fixture was captured in seconds and a parts list was generated, priced to Austin’s current market.
Project Highlights
- Two widespread faucets installed in under 90 minutes
- Supply valves upgraded and pressure-tested to 100 psi
- Quote delivered on site, winning homeowner approval for additional vanity lighting the same day
Lessons for Residential Contractors
- Upsell opportunities surface when you finish small tasks flawlessly. A clean faucet install built trust and opened the door to larger scope.
- Real-time cost data keeps margins healthy even as material prices fluctuate. Auto-updates material rates every 24 hours.
- Digital documentation reduces callbacks. Photos and checklists stored in the portal proved the work met code and manufacturer specs.
Scaling Your Business
- Integrate AI takeoffs into your proposal workflow to bid bathrooms, kitchens, and whole-home remodels faster than competitors.
- Track labor in real time. Voice prompts log start and finish times, feeding directly into payroll and client invoices.
- Share branded maintenance guides. Homeowners who receive professional documentation are more likely to book future projects with the same contractor.
Whether you manage ten faucet swaps a week or full-gut renovations, equipping yourself with data, documentation, and streamlined communication is essential. Visit the portfolio to see more residential transformations or schedule a free demo.