How to Install Laminate Flooring on the Ceiling
Price source: Costs shown are derived from our proprietary U.S. construction cost database (updated continuously from contractor/bid/pricing inputs and normalization rules).
Eva Steinmetzer-Shaw
Head of Marketing
Ceilings That Wow: An Introduction
Installing laminate flooring on the ceiling is a cost-effective way to add character to any room. With costs ranging from $660–$1,220 per opening, this method offers a high-impact finish that mimics real wood, hides imperfections, and elevates property value. This guide combines hands-on field experience with advanced planning techniques to help you execute the upgrade with confidence.
Why Choose Laminate Over Wood or Drywall?
Weight & Handling – Modern click-lock laminate planks are lighter than hardwood, reducing strain on framing members.
Cost Efficiency – Materials are 25-40% less expensive than solid wood while delivering a realistic grain pattern.
Moisture Resistance – Factory-sealed edges repel humidity better than site-finished boards, ideal for bathrooms and kitchens.
Rapid Installation – Floating systems minimize fasteners, saving labor hours.
Pre-Construction Planning
Before starting, ensure accurate measurements and planning:
- Walk the room to capture dimensions for square-footage calculations.
- Pinpoint existing joist direction to optimize plank orientation.
- Generate a real-time material list and labor schedule.
Materials and Tools Checklist
- Click-lock laminate planks (AC3 or higher abrasion rating)
- 1x3 furring strips or metal hat channel
- Construction adhesive rated for ceilings
- 1-¼" brad nails or screws
- Stud finder and chalk line
- Finish trim (crown, L-channel, or quarter round)
- Safety gear: eye protection, gloves, dust mask
Step-by-Step Installation Guide
- Condition the planks: Store laminate in the room for 48 hours to acclimate.
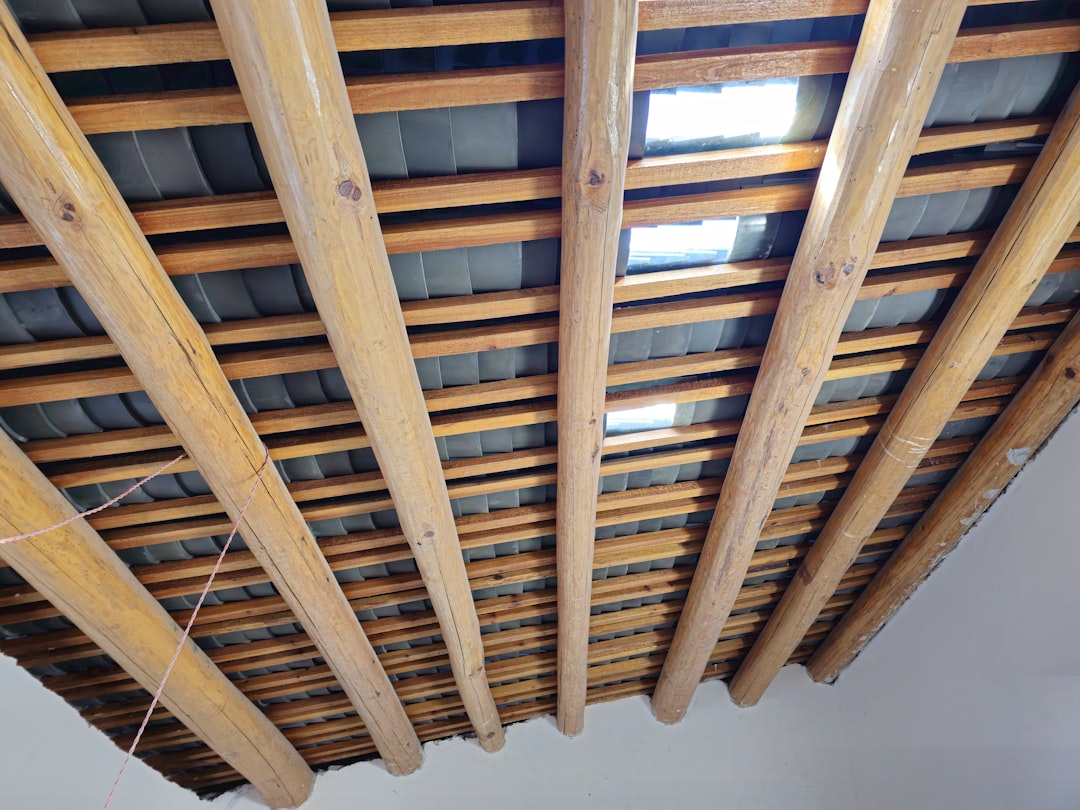
- Locate joists: Use a stud finder and mark lines perpendicular to joist direction for furring strip installation.
- Install furring strips: Fasten 1x3 lumber at 16" centers, ensuring a level grid.
- Plan your layout: Snap a chalk line down the center of the ceiling or start along the most visible wall; dry-fit two rows to verify symmetry.
- Apply adhesive: Run a serpentine bead on each furring strip before placing planks.
- Click and stick: Engage the tongue and groove on the floor, then lift into place. Press firmly against adhesive and secure with brad nails through the groove to hide fasteners.
- Stagger joints: Maintain a minimum 8" offset for structural integrity and aesthetic rhythm.
- Trim edges: Rip final row to fit, leaving a ¼" expansion gap along walls.
- Finish with molding: Cover the gap using crown or quarter round fastened only to the wall, not the plank.
- Document completion: Snap photos and sync with your project dashboard for seamless invoicing.
Common Mistakes and How to Avoid Them
- Overlooking acclimation time leads to buckling—let the planks rest.
- Ignoring joist direction can create unnecessary waste.
- Nailing through the face voids warranties—always hide fasteners in the groove.
- Skipping adhesive risks sagging panels—use both glue and nails for a permanent bond.
Maintenance and Longevity
Laminate ceilings require minimal upkeep:
- Vacuum occasionally with a soft brush attachment
- Spot clean using a damp microfiber cloth—avoid soaking seams
- Inspect annually for loose trim; re-nail if necessary
Because planks remain out of foot traffic, finishes often outlast floor installations by 10 years or more.
Case Spotlight: The Maple Avenue Bungalow
When the owners of a 1940s bungalow wanted a budget-friendly way to highlight their open-concept kitchen, a whitewashed oak laminate ceiling was proposed. Here's how the process unfolded:
- Voice Survey in 12 Minutes: Exact measurements, ceiling height variations, and lighting locations were captured.
- Instant Proposal: Materials, labor, trim details, and finish selections populated a branded quote approved on the spot.
- Same-Day Material Procurement: Pricing and availability were locked in before leaving the driveway.
- Two-Day Install: A single lead carpenter and one apprentice completed furring, plank installation, and crown molding with zero change orders.
- 18% Margin Increase: Real-time cost monitoring flagged a temporary adhesive price drop, passing savings to the client while preserving profit.
Five Pro Tips for High-Efficiency Crews
- Pre-cut starter rows on-site to reduce ladder time
- Use laser lines to maintain plank alignment and speed up quality checks
- Keep a backup brad-nailer on hand; ceiling work can slow to a halt if tools jam
- Assign one crew member to adhesive application and another to plank placement for continuous flow
- Record a quick video walkthrough to showcase craftsmanship for future marketing
Beyond Ceilings: Upselling Opportunities
Data shows that 62% of homeowners who approve a laminate ceiling also request accent walls or floor replacements within six months. Use your post-project survey to propose:
- Matching feature walls in dining rooms
- Under-cabinet laminate backsplashes
- Whole-home flooring upgrades with integrated baseboard packages
Generate these upsell quotes in seconds, solidifying repeat business.