

Installing a new door jamb is a critical task for construction professionals, ensuring both structural integrity and aesthetic appeal. Costs for door jamb installation can range from $183–$280 per opening, depending on materials and labor rates. This guide provides a comprehensive overview of the process, integrating digital tools to enhance efficiency and accuracy.
• Structural strength: The jamb transfers the door’s weight into the surrounding studs, preventing sagging.
• Weatherproofing: Precise alignment ensures even contact with weatherstripping, lowering utility bills.
• Security: Proper anchoring resists forced entry and keeps hardware tight.
• Aesthetics: Straight, true jambs eliminate uneven reveals and binding.
1. Splitting wood around hinge screws that no longer tighten
2. Visible rot or termite damage at the bottom of the jamb
3. Persistent drafts despite weatherstripping upgrades
4. Door leaf rubbing or sticking after repeated adjustments
Before starting, accurate quantities and labor hours keep budgets on track. Use digital estimating tools to convert your scope into a detailed materials list—jamb stock, casing, shims, fasteners, low-expansion foam, and paint—along with real-time pricing from local suppliers.
• Pre-hung or knock-down jamb kit sized to door leaf
• 3-1/2” exterior-grade screws
• Wood shims or composite shims
• 4’ or 6’ level
• Finish nailer or hammer and 8d finish nails
• Low-expansion foam sealant
• Backer rod and high-quality caulk
• Paint or stain to match casing
• Score paint lines where casing meets drywall to avoid torn paper.
• Pry off interior and exterior casing carefully for possible reuse.
• Cut through nails or screws with a reciprocating saw, then remove side jambs and head jamb.
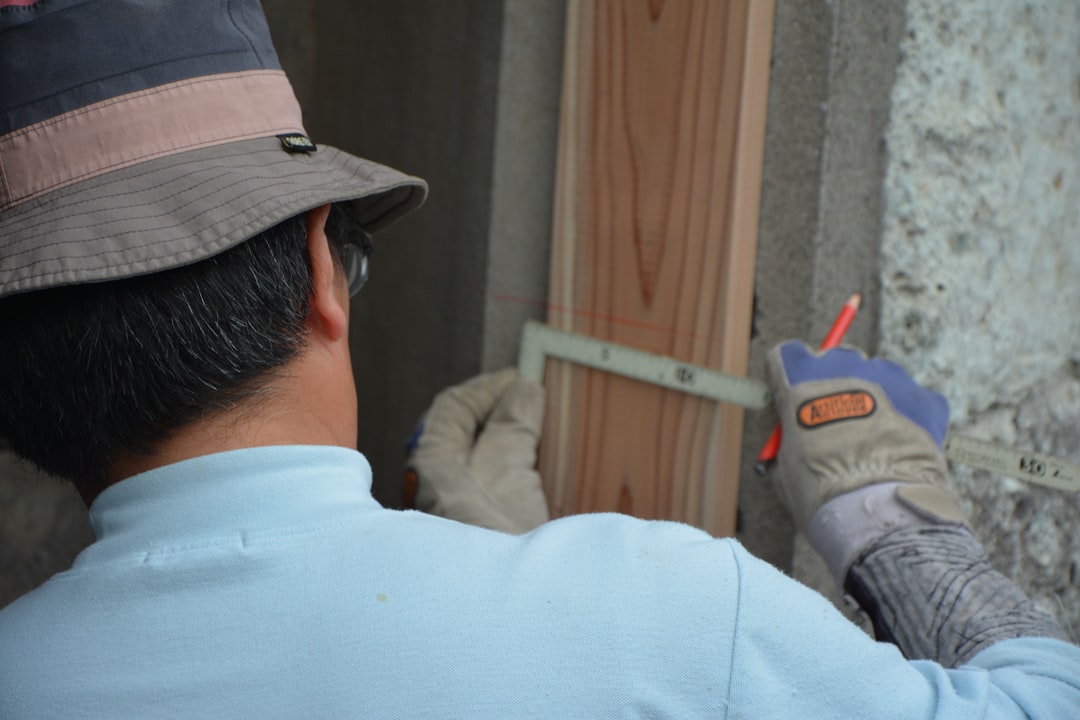
• Check trimmer studs for plumb in both directions; shim or plane as needed.
• Measure width and height in three places each; the smallest dimensions dictate jamb sizing.
• Verify sub-sill is level and free of rot; sister new blocking if required.
• Cut side jambs to length, allowing 1/4” clearance above finished floor.
• Fasten head jamb to sides using pocket screws or corrugated fasteners, maintaining perfect 90° corners.
1. Center the jamb in the opening, keeping equal gaps on both sides.
2. Insert pairs of opposing shims behind upper hinge locations and check plumb with a level.
3. Drive 3-1/2” screws through hinge plates and shims into studs.
4. Shim latch side at strike height, then at top and bottom of the jamb, checking reveal on the door leaf.
5. Secure with additional screws or finish nails, countersinking heads for putty.
• Apply low-expansion foam between jamb and framing—avoid overfilling, which can bow jamb legs.
• After foam cures, trim excess, install backer rod, and caulk exterior perimeter.
• Reinstall existing casing or cut new profiles for an upgraded look.
• Nail casing to jamb and studs, then fill nail holes, sand, and paint.
• Under-ordering materials: Use AI takeoffs to calculate waste factors, so you purchase once.
• Hidden labor overruns: Use voice-guided time logs to keep crews on schedule.
• Callback headaches: Use a quality-control checklist to flag tolerance thresholds for reveal, swing clearance, and lockset alignment.
Construction professionals juggle multiple installs daily. Unify takeoff, estimate, and invoice into one continuous data string. When you finish installing a new door jamb, tap “complete” on the mobile dashboard. The system timestamps labor, adjusts inventory, and generates a branded invoice ready for email.
• Pre-drill hinge screws to prevent splitting on paint-grade jambs.
• Use a story pole marked with hinge and strike locations for rapid layout.
• Reverse your shim pairs after plumbing one side to keep equal pressure and avoid twist.
• Apply two beads of sealant under the threshold for moisture control.
• Save removed casing as a template for quick miter angles on new trim.
Not every job fits the DIY or small-crew model. Historic homes, out-of-square openings, or doors heavier than 120 pounds demand specialized tooling and structural assessment. Partner with certified carpenters for complex installations.
Installing a new door jamb combines precision carpentry with smart planning. By leveraging digital estimating and field management tools, you reduce guesswork, control costs, and deliver a flawless swing every time. Bring the digital advantage to your next residential project—your clients and your bottom line will notice the difference.
When Sunrise Builders partnered on a 24-unit townhome development, each unit required installing a new door jamb at three entries—front, garage, and patio French doors. Traditionally, the site superintendent spent two days walking units, tallying jamb counts, and phoning suppliers. With voice estimation, the same scope was captured in 15 minutes.
• Labor forecasting: Estimated 96 labor hours across the development. Actual logged hours: 94, a 2% variance.
• Material accuracy: Only two extra jamb kits were ordered, trimming carrying costs and on-site clutter.
• Schedule compression: Automated ordering shaved 48 hours off the critical path, allowing painters in sooner.
1. The superintendent opened a mobile device, stated, “Installing a new door jamb, 72 by 80, pine, three per unit.”
2. AI matched local lumberyard pricing, generated a cost code, and pushed a purchase order draft to accounting.
3. Field carpenters accessed a preloaded digital checklist ensuring plumb, level, square checks were documented with photos.
4. Upon completion, auto-populated invoices and synced them with the builder’s ERP, eliminating manual entry.
• Standardizing jamb sizes across units multiplied purchasing power and simplified quality control.
• Real-time variance reports pinpointed one crew that required additional training—addressed before punch-list escalation.
• Client walk-through satisfaction scores improved thanks to uniform reveal lines and smooth swings across all homes.
Whether you manage a single renovation or a multi-unit rollout, deliver the same precision, accountability, and speed. Explore more residential success stories or schedule your personalized demo.
