Guide to Installing Block Wall in Homes
Price source: Costs shown are derived from our proprietary U.S. construction cost database (updated continuously from contractor/bid/pricing inputs and normalization rules).
Eva Steinmetzer-Shaw
Head of Marketing
Installing Block Wall: A Modern Residential Essential
Installing a block wall in residential construction is a crucial task that requires precision and expertise. The cost for installing a block wall typically ranges from $15 to $30 per square foot, depending on the complexity and location. Concrete masonry unit (CMU) walls offer unmatched durability, making them a preferred choice for framing basements, supporting terraces, or dividing interior spaces. By integrating advanced estimating tools, construction professionals can enhance efficiency and accuracy.
Why Professionals Choose CMU
- Structural strength that resists rot and pests
- High fire rating for improved safety
- Excellent thermal mass with insulation
- Versatile finishes to match any style
- Cost-effective compared to poured concrete
Pre-Construction Planning: Accurate Estimates
Before laying the first course, contractors need reliable quantities and labor projections. Advanced AI tools eliminate guesswork during the bidding phase, ensuring precise estimates.
Key Data Points for Accurate Takeoffs
- Wall dimensions from PDFs or BIM files
- Block size, texture, and strength class
- Reinforcement locations
- Mortar type and estimated bag count
- Scaffold height and site access
Materials Checklist for Installing Block Wall
- Standard 8 x 8 x 16 CMU blocks
- Type S or N mortar mix
- Rebar #4 or #5 for cores and footings
- Grout and grout pump
- Bond beam and lintel blocks
- Waterproofing membrane
- Anchor bolts and wall ties
- Mason's line, trowels, and levels
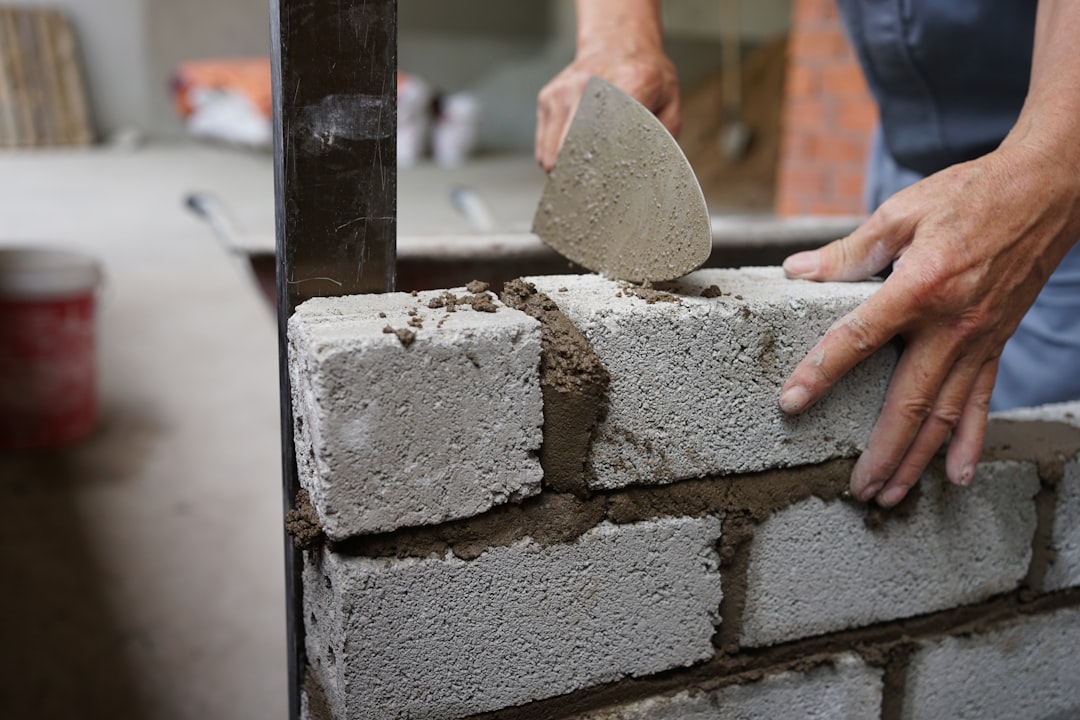
Step-by-Step Installation Workflow
1. Site Prep and Layout
- Excavate to frost depth
- Stake wall lines using batter boards
2. Footing Formation
- Form and pour concrete footing
- Insert vertical rebar dowels
3. First Course Placement
- Snap chalk lines for alignment
- Butter blocks with full joints
4. Building Up Courses
- Stagger joints for continuity
- Maintain joint thickness
- Place horizontal reinforcement
5. Reinforcement & Grouting
- Thread vertical bars through cores
- Cap height with grout
6. Control Joints & Lintels
- Form control joints at intervals
- Install bond beam blocks
7. Curing & Finishing
- Keep wall damp for curing
- Apply parge coat or veneer
Pro Tips for Installation
- Dry-stack a test run
- Order extra block for breakage
- Use pre-blended mortar colors
- Record labor hours for cost updates
- Schedule inspection after grout pour
Budgeting with Confidence
Hidden costs like scaffold rental and delivery delays can impact budgets. Using live materials databases ensures estimates remain current, even on long projects.
Health & Safety Considerations
- Provide lifting aids for heavy blocks
- Mandate full-face protection
- Install guardrails on scaffold
- Use dust-extracting saws
Integrating Advanced Tools with Your Workflow
- Capture blueprint data easily
- Conduct voice-guided site walks
- Auto-generate Bill of Materials
- Present polished quotes
- Sync scope to accounting
Ready to Build Stronger Walls—and Profits?
From initial planning to final inspection, advanced tools keep contractors on schedule and within budget. Explore more solutions at CountBricks.com.
Case Spotlight: Oak Ridge Patio Retaining Wall
A recent project in Oak Ridge involved a multi-level patio with a 6-ft structural retaining wall. Traditional bids varied significantly, but using advanced takeoff tools, the contractor captured exact elevations and generated a materials list quickly.
Project Metrics
- 42 linear feet at 6 ft height, 8 in. thick
- 725 standard CMU, 65 bond-beam units, 350 ft of #5 rebar
- 11 yd³ grout with high-flow additive
Outcome Highlights
- Estimate accuracy within 2% of final invoice
- Labor scheduled at 62 crew-hours; actual 59 hours
- Interactive quote with veneer options
Lessons Learned
- Early collaboration shortened approval cycle
- Real-time cost updates improved decision-making
- Mobile checklist verified rebar placement
Scale Your Masonry Business
Reduce bid variance and tighten schedules by integrating advanced tools into every project. Visit CountBricks.com for more success stories.